- Home
- Work At Home Business Opportunity
- Worm farming
A DIY Worm Farm is so easy
Easy to Start
Easy to maintain
Hi Warren here.
In these times, one of my hobbies is black gold digging. Read on to find out all about one of my greatest passions: a DIY worm farm and black gold digging.
It‘s my hobby at the moment, but it wouldn’t be very hard to commercialise it, if I scaled up my operations. Ideal for an add on bonus income for Gardeners, Landscapers, those with a Lawn Mowing business, or to start from scratch as a new income source.
This page is about what I do and some of the easiest DIY Worm Farm ideas you can imagine.
get started ... it's really easy!
It’s easy to start really small and see how it goes. A good place
for all those kitchen food scraps. If it doesn’t work out you just tip
it into the garden and off they go. But if you are as excited as I am
about the amazing work these little critters can do, then I believe
there’s the making of a good little business selling “black gold” to
local gardeners, and maybe even growing worms to sell.
Worm farming is certainly easy to start and very easy to maintain. A small start to get the hang of it, then if all is ok, it’s easy to scale up. All you need are some containers and a shady spot.
I have been putting some photos together of my humble worm farming.
a container for your DIY Worm Farm
You need a container. This could be an ice cream container, a bucket, or a dark tray, an old garbage bin is great, an old bathtub is ideal.
I have two setups:
One is a bought 3 Level worm farm from Aldi. Bunnings and hardware shops sell them.
My larger one is an old green waste garbage bin buried in the garden with old fence palings dividing it in half. You can use old bathtubs too. I’ll explain that later.
Worms and food scraps
Next are some worms from the local hardware shop. You can buy a box of worms right off the shelf would you believe.
Then a good source of food scraps.
Some water to sprinkle on so your worms' home stays moist.
Some newspaper torn up providing carbon to balance the food waste.
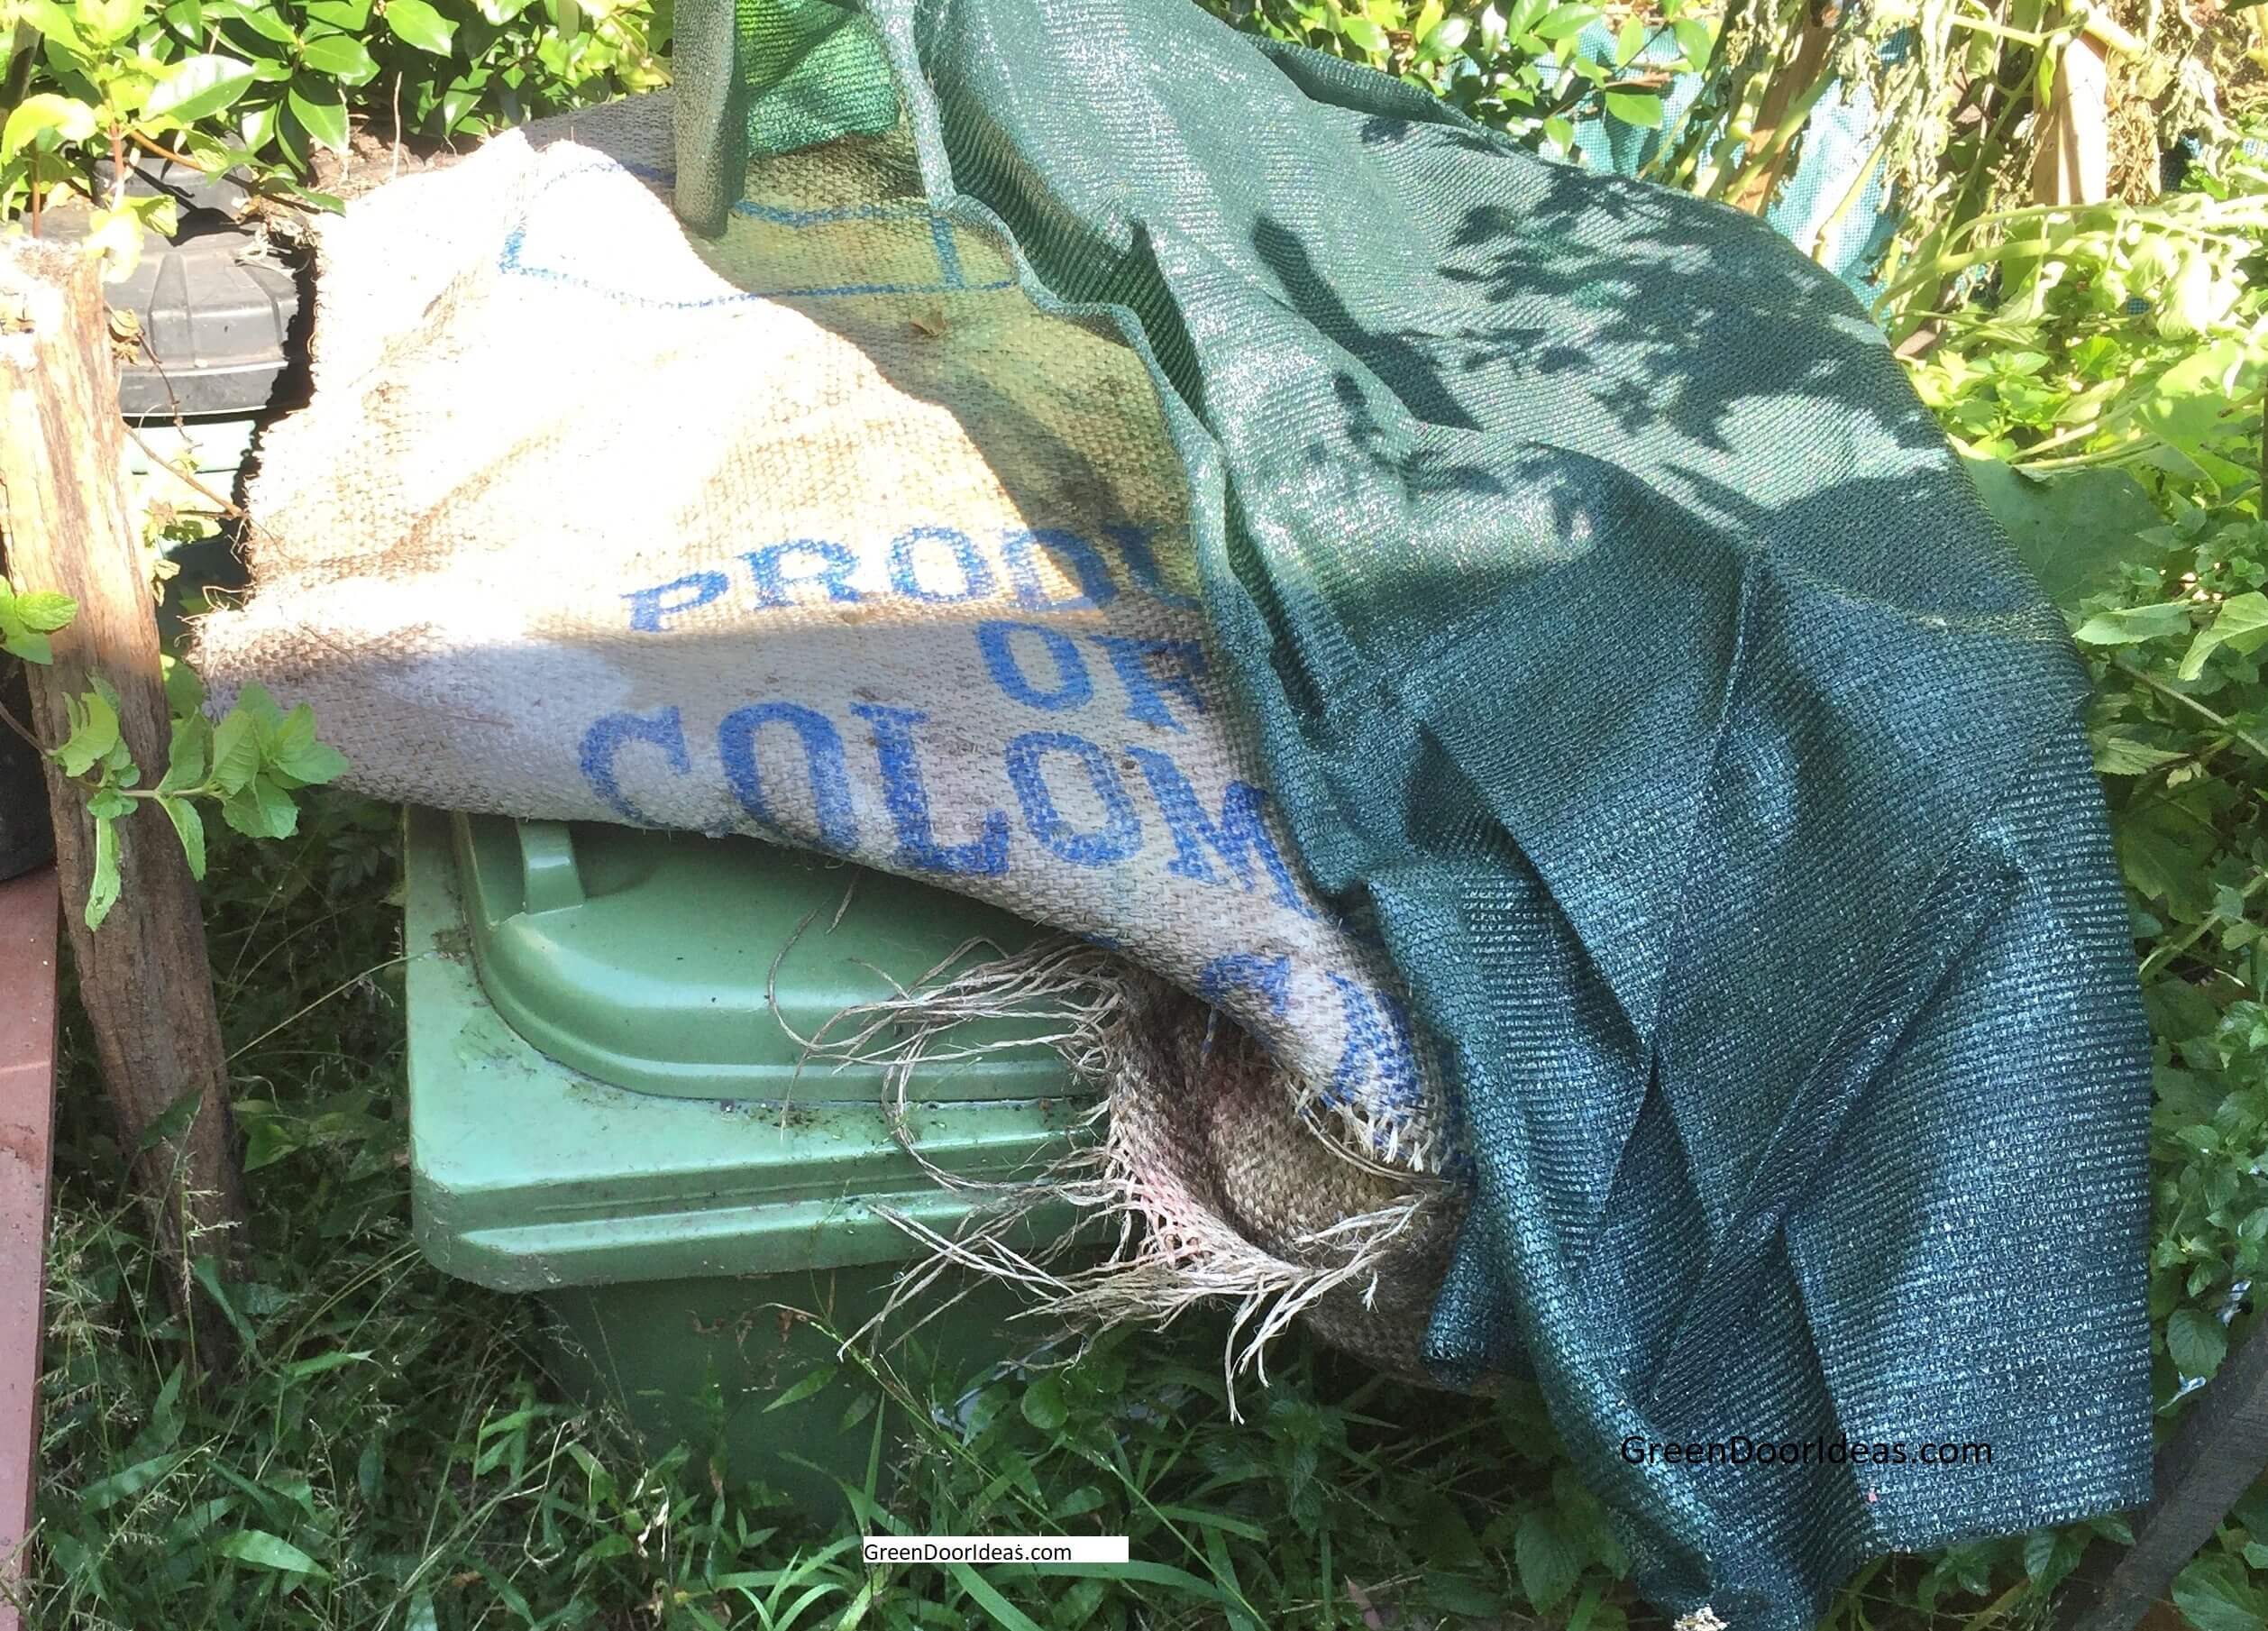
A shady spot to set up, or a hessian bag and/or shade cloth for summer if out in the sun.
That’s it.
Attached are photos of my two setups full of thousands of worms.
All the best worm farming.
Kind regards,
Warren
The Black Gold Digger
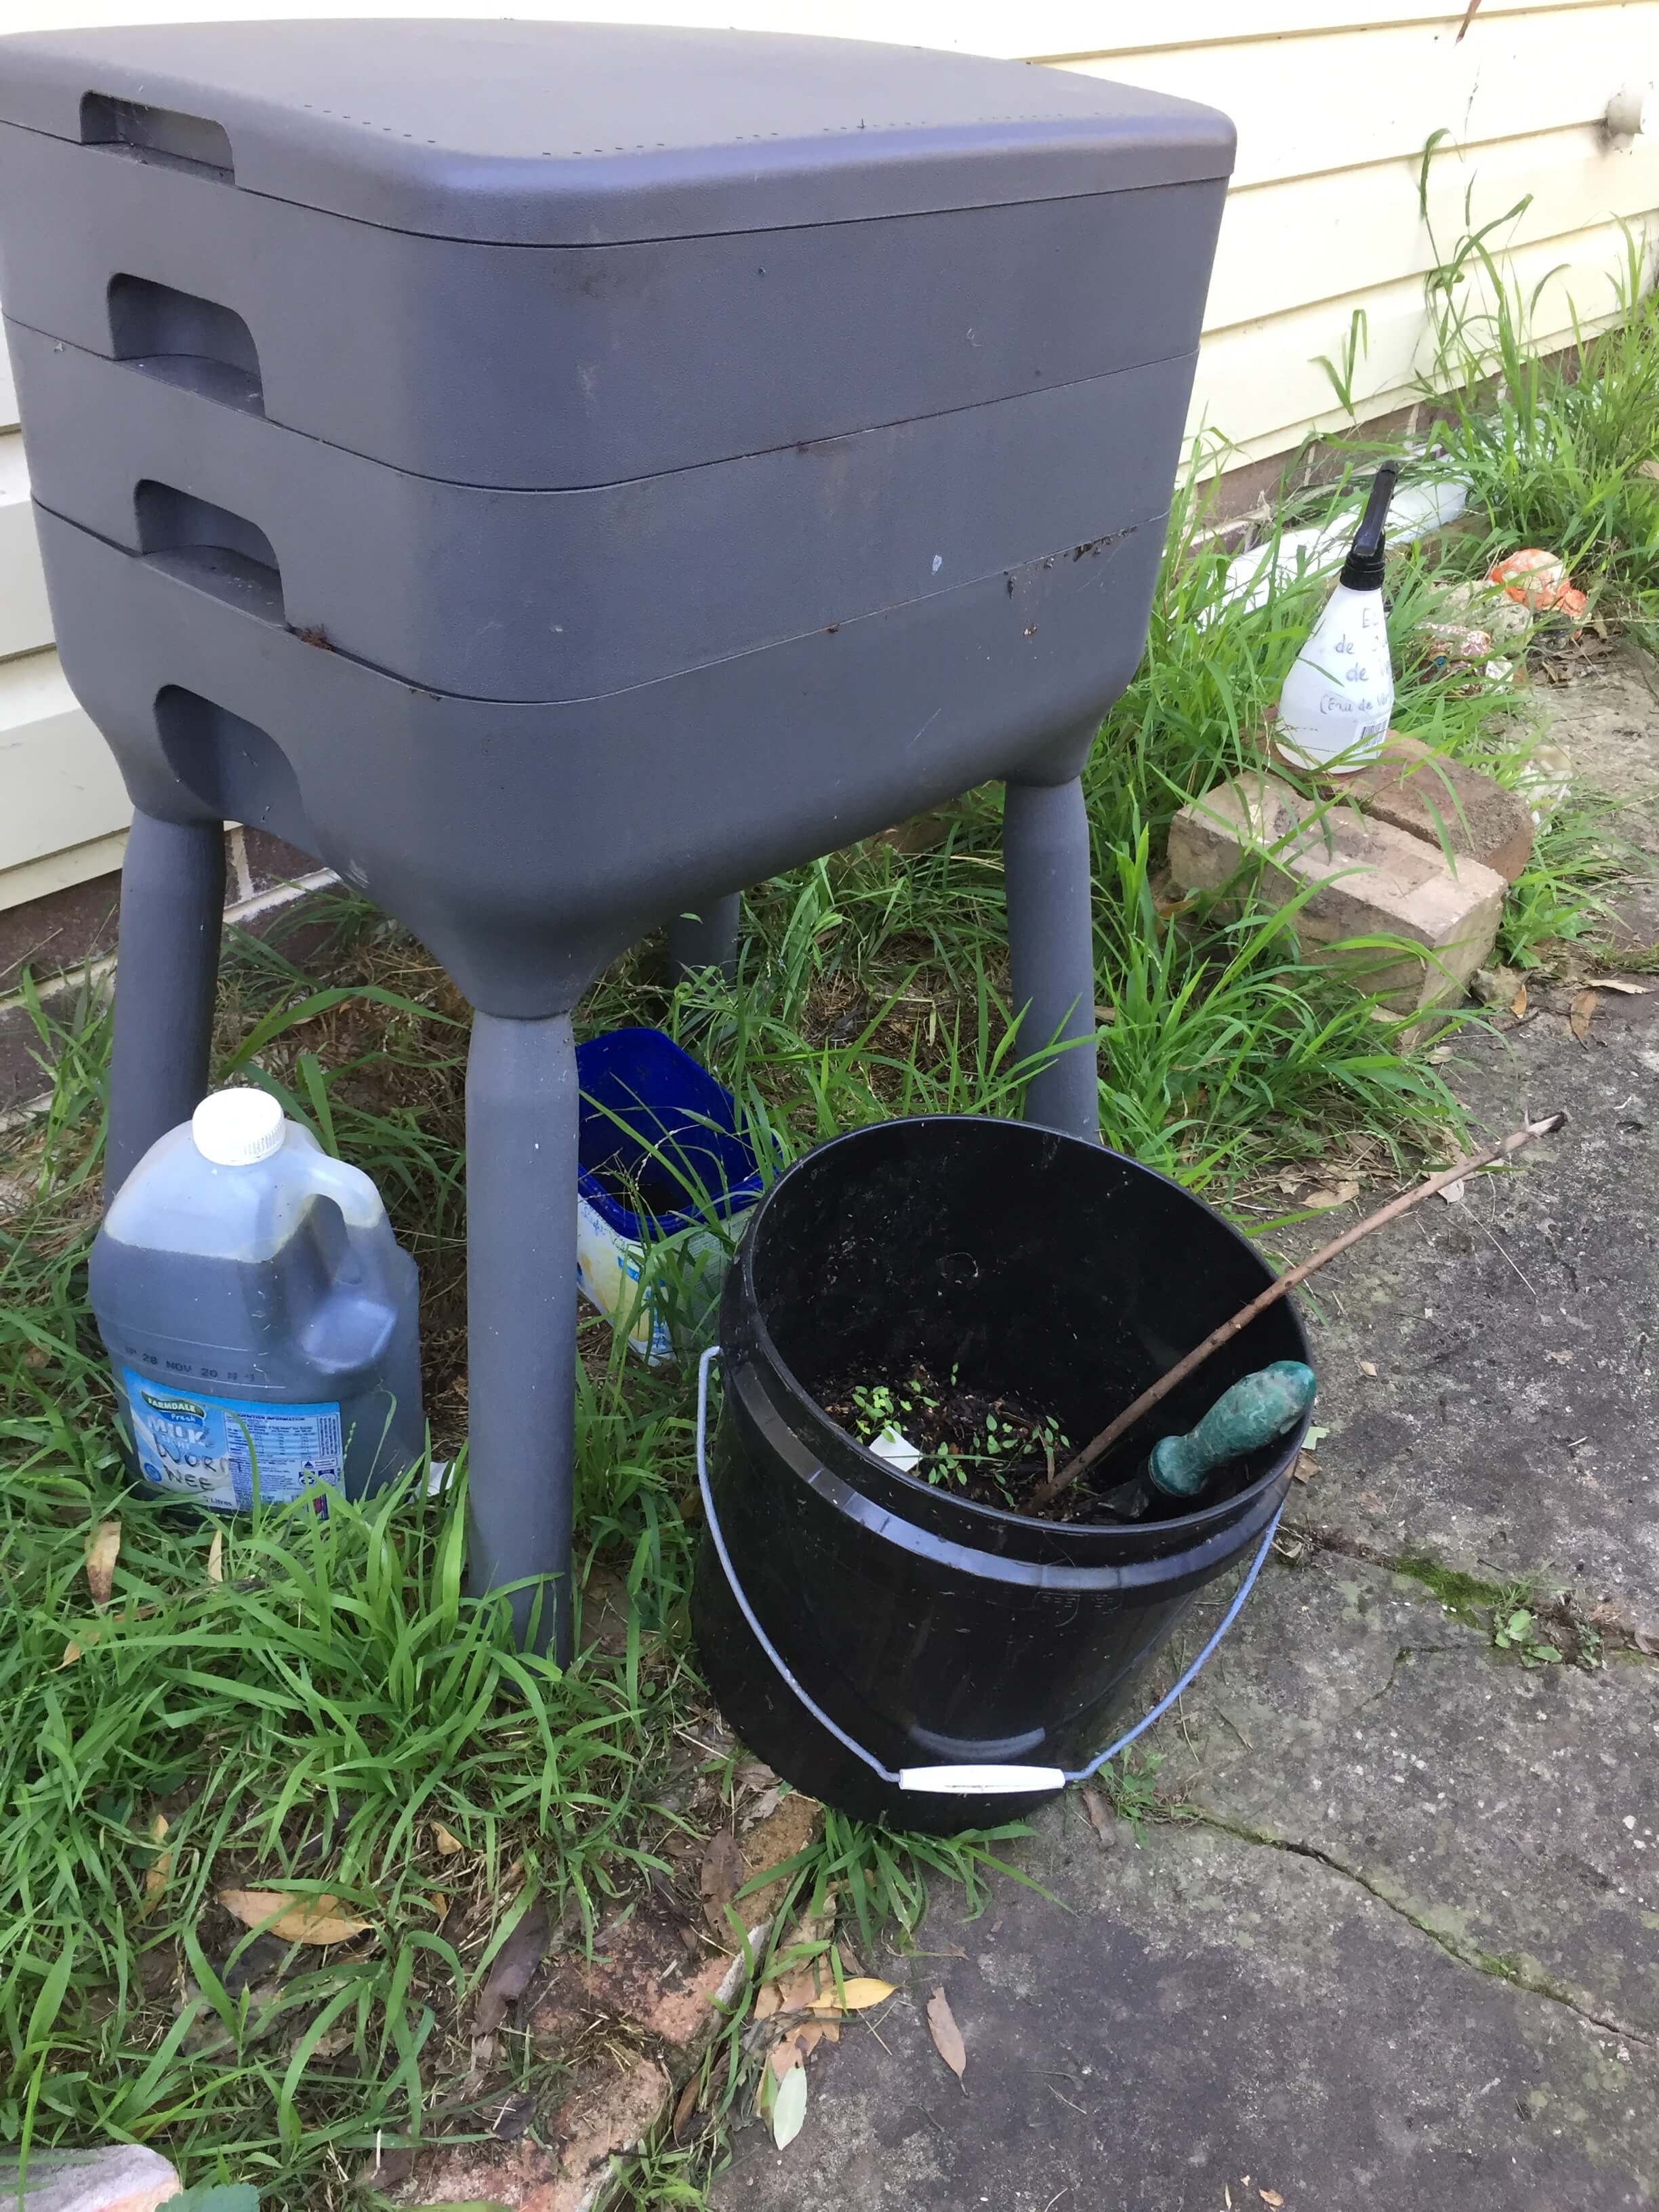
My three level bought worm farm.
Note the black bucket of worm castings (poo) or black gold. There are already small plants sprouting in it as its so rich.
Also a 3L milk container of worm wee which comes out the bottom into the blue ice cream container. This is diluted and sprayed onto plants.
At the back is my water spray bottle to keep the worms moist and cool.
Both the castings and the worm wee could be packaged nicely and sold.
My old Green Waste bin buried in the garden. I kept the bin when new ones were provided. The flip lid is very convenient.
You can see the lush growth surrounding the bin - it’s the black gold at work!
This is how I cover it in summer with a bag and shade cloth to keep the worms cool. I also sprinkle water on the bag which cools nicely as it evaporates.
here are some details ....
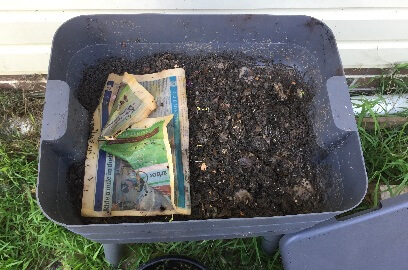
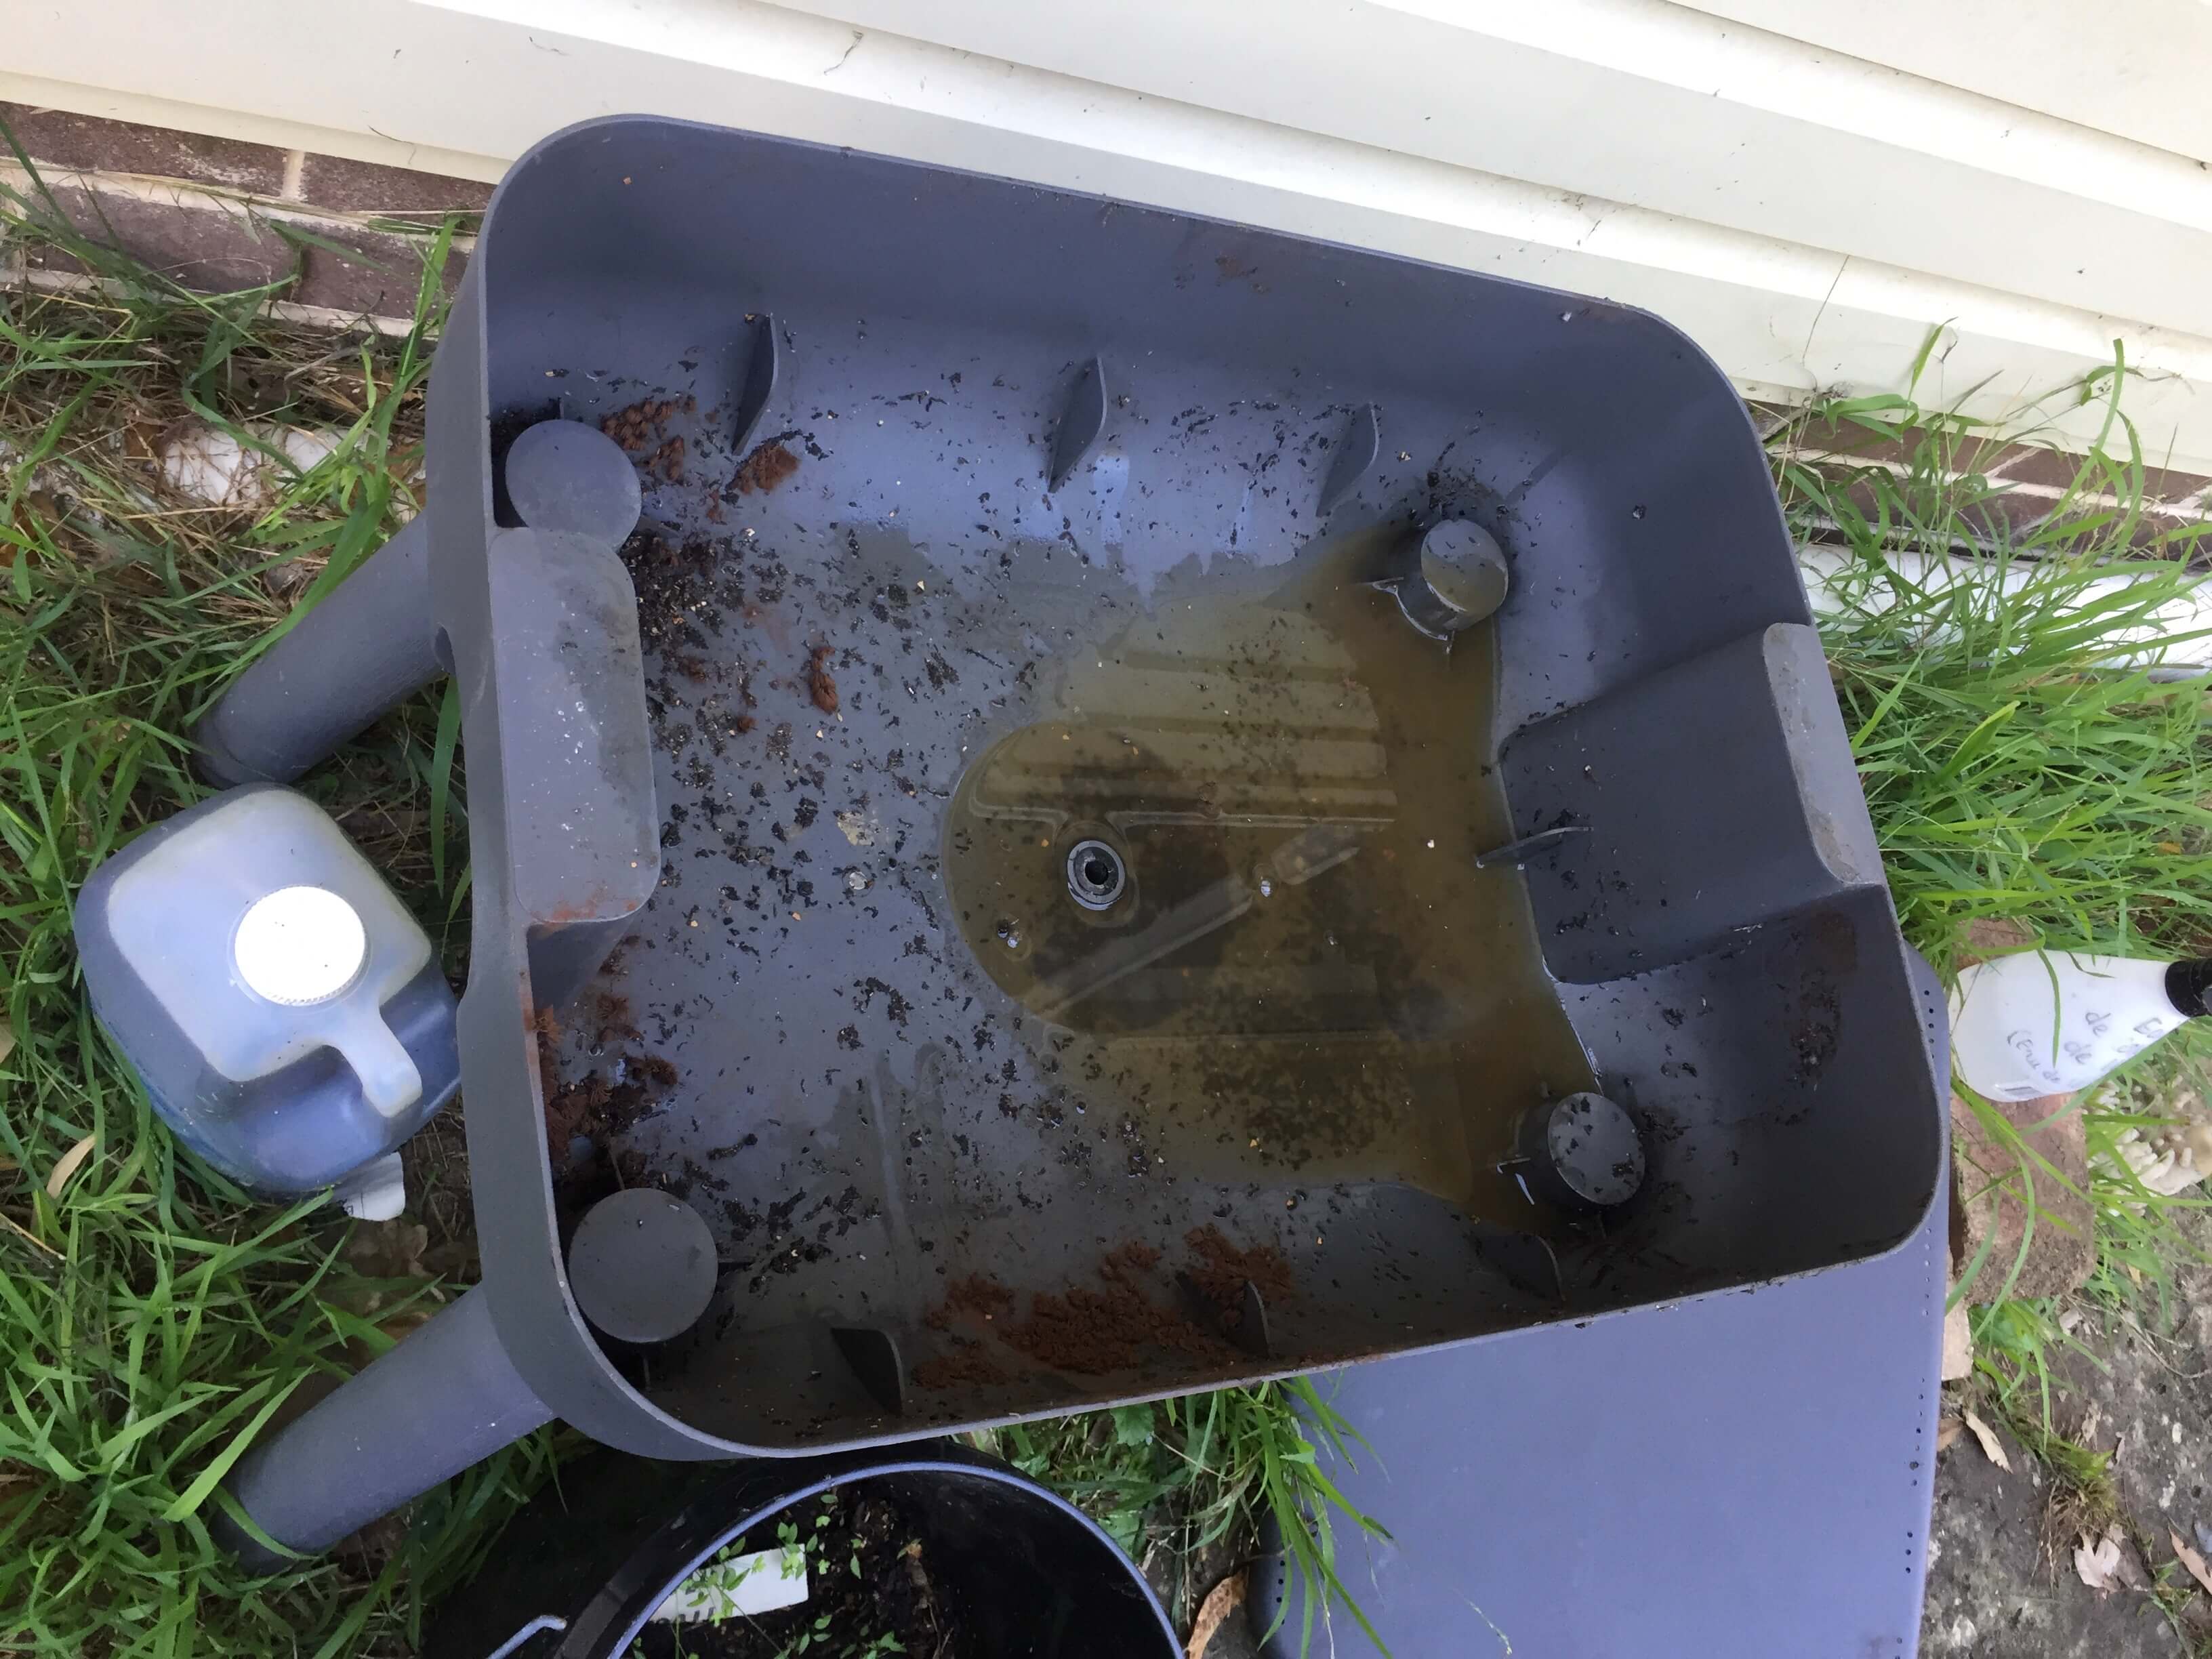
Top Level 3 of worm castings
The worms have left now to move to Level 3 where all the food is now. This Level 3 is ready for collecting the worm castings into my black bucket.
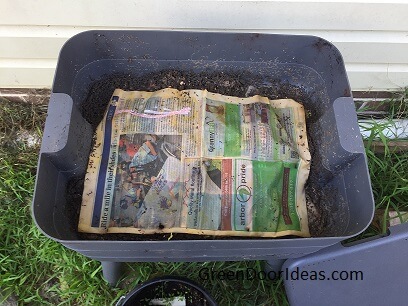
Level 3 with the cooling paper pulled back
Level 2 is where the food is
There's no photo for Level 2. It has the food scraps plus a piece of paper on top to keep light out and sprayed with water to keep them moist.
Level 1 where all the worm wee falls
Note the tap on the bottom. I leave it open and the worm wee falls into the ice cream container below then I pour it into a 3L milk bottle.
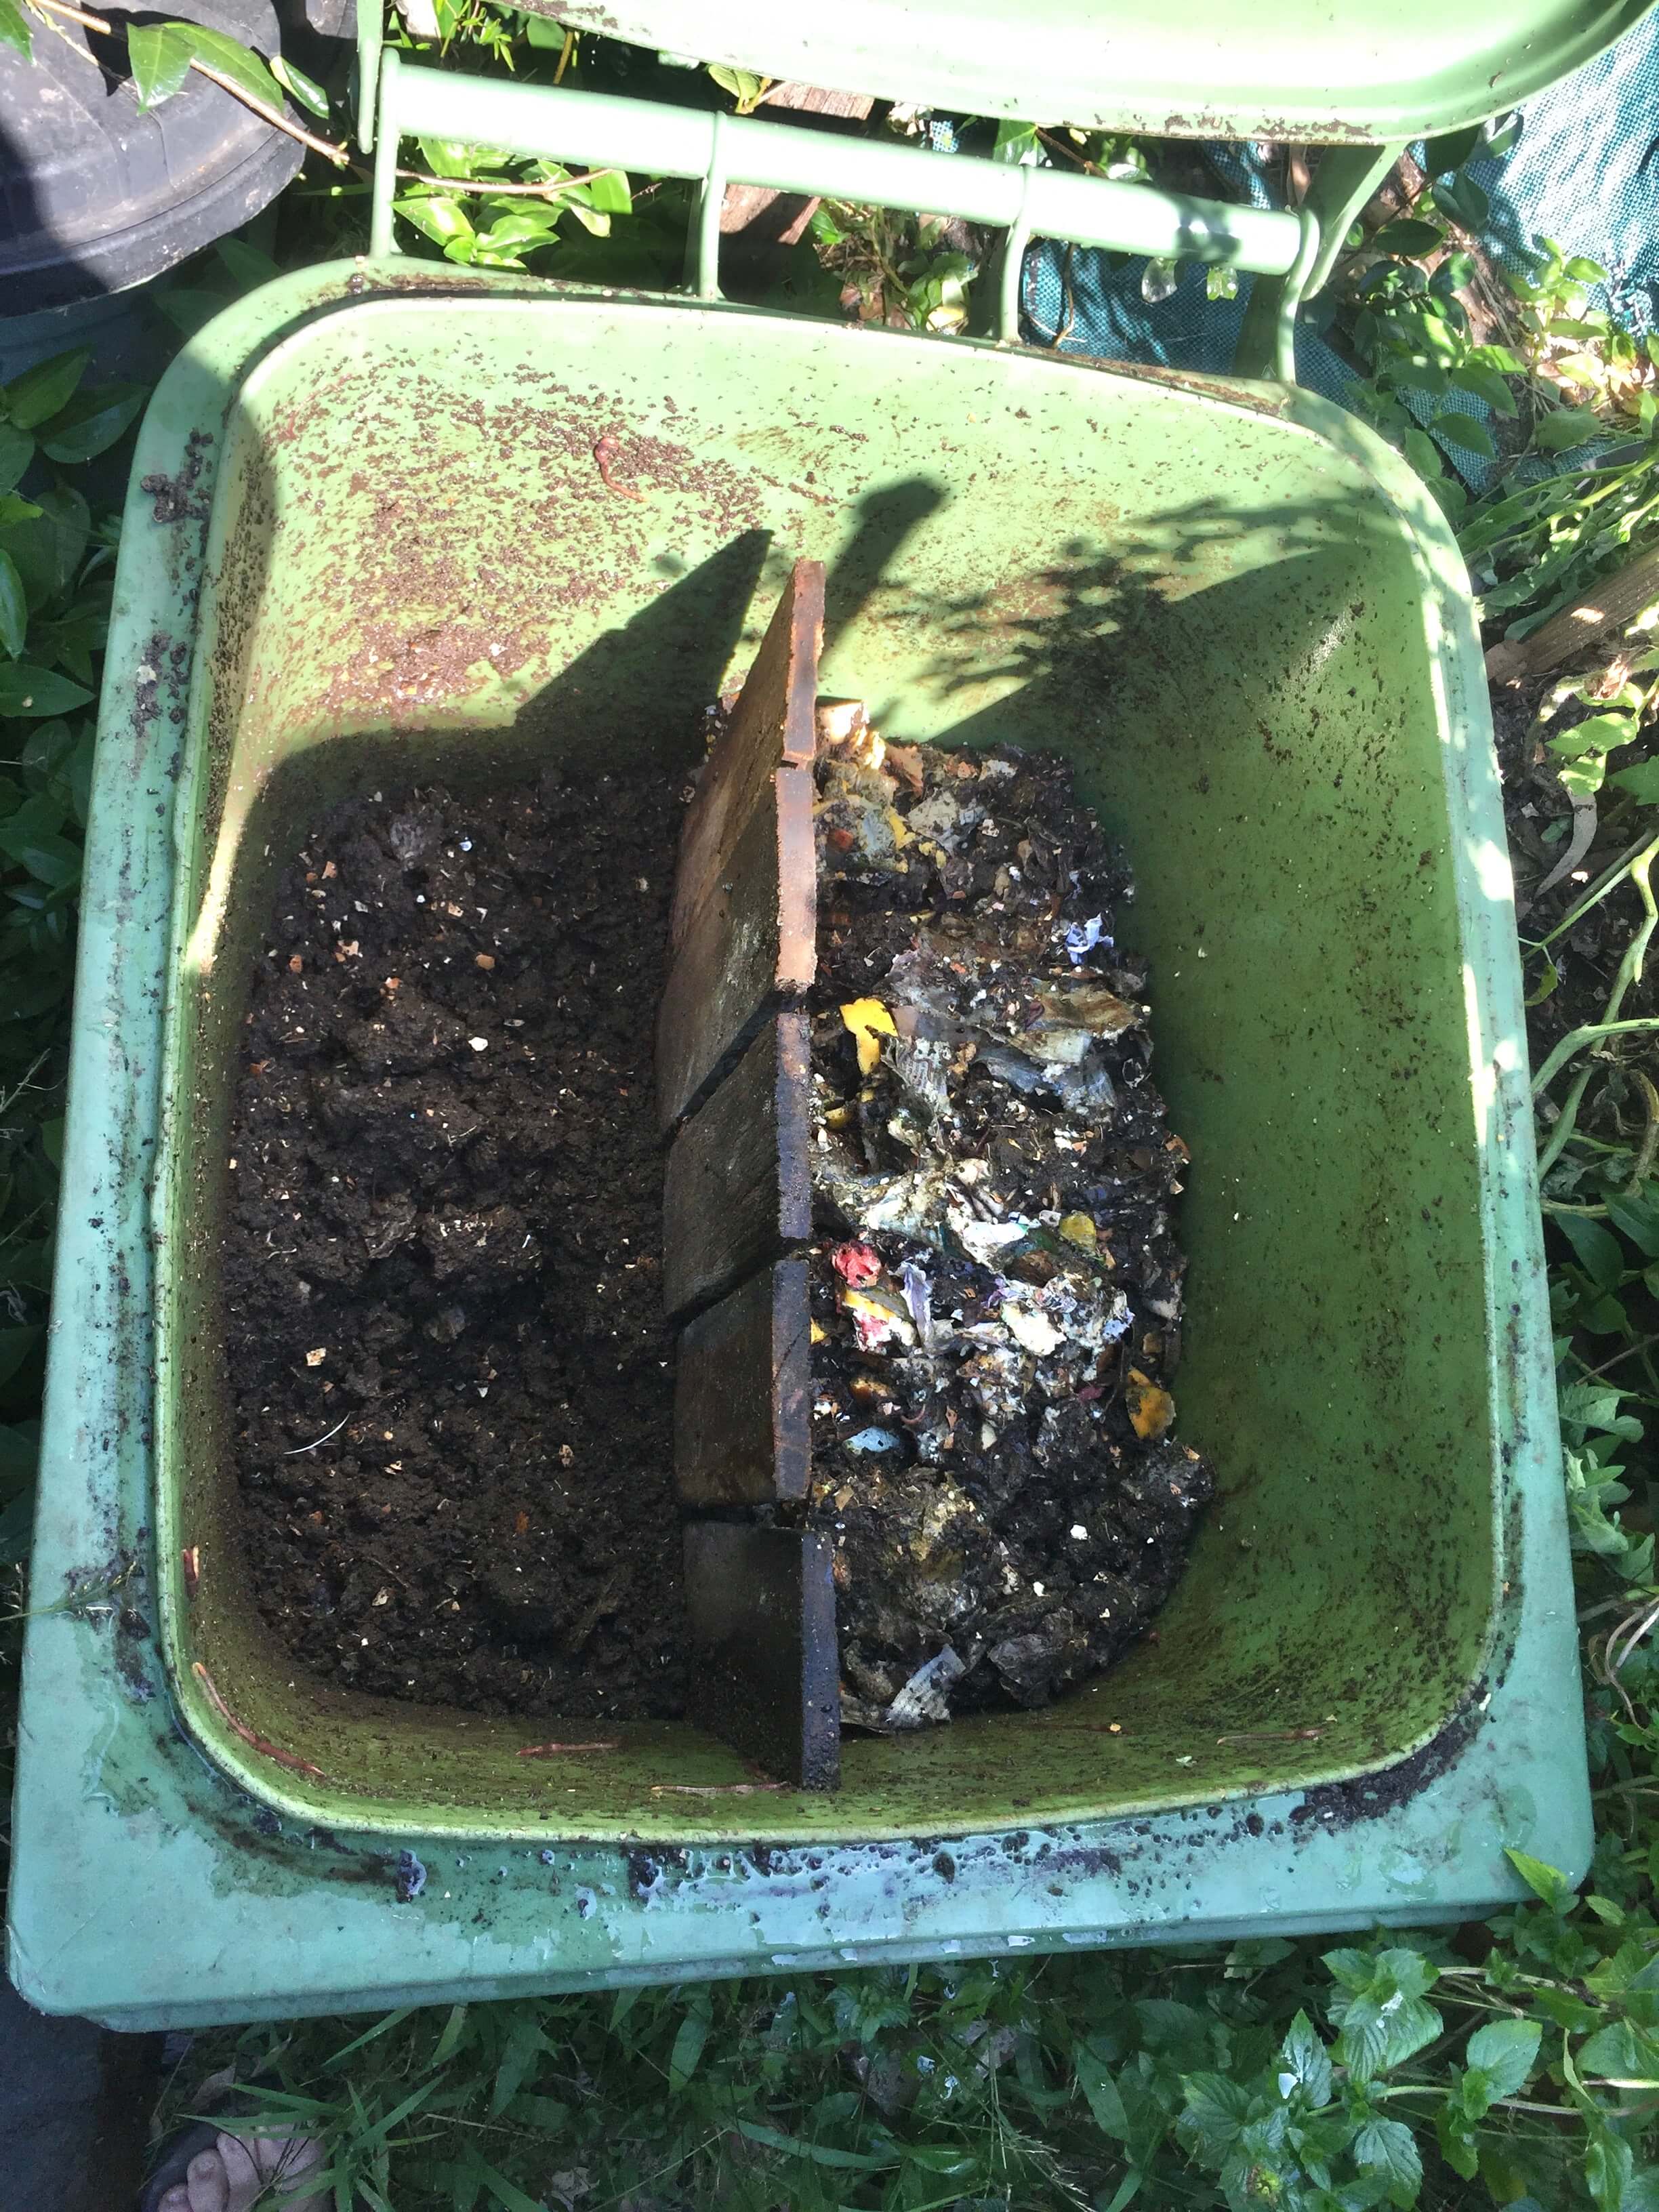
My Compost Bin turned into a worm hotel
Lid open
You can see the two halves separated by the old wood palings hammered in. The worms move freely between the gaps looking for food. The best food is on the right and the old castings are on the left ready to be dug out for the garden.
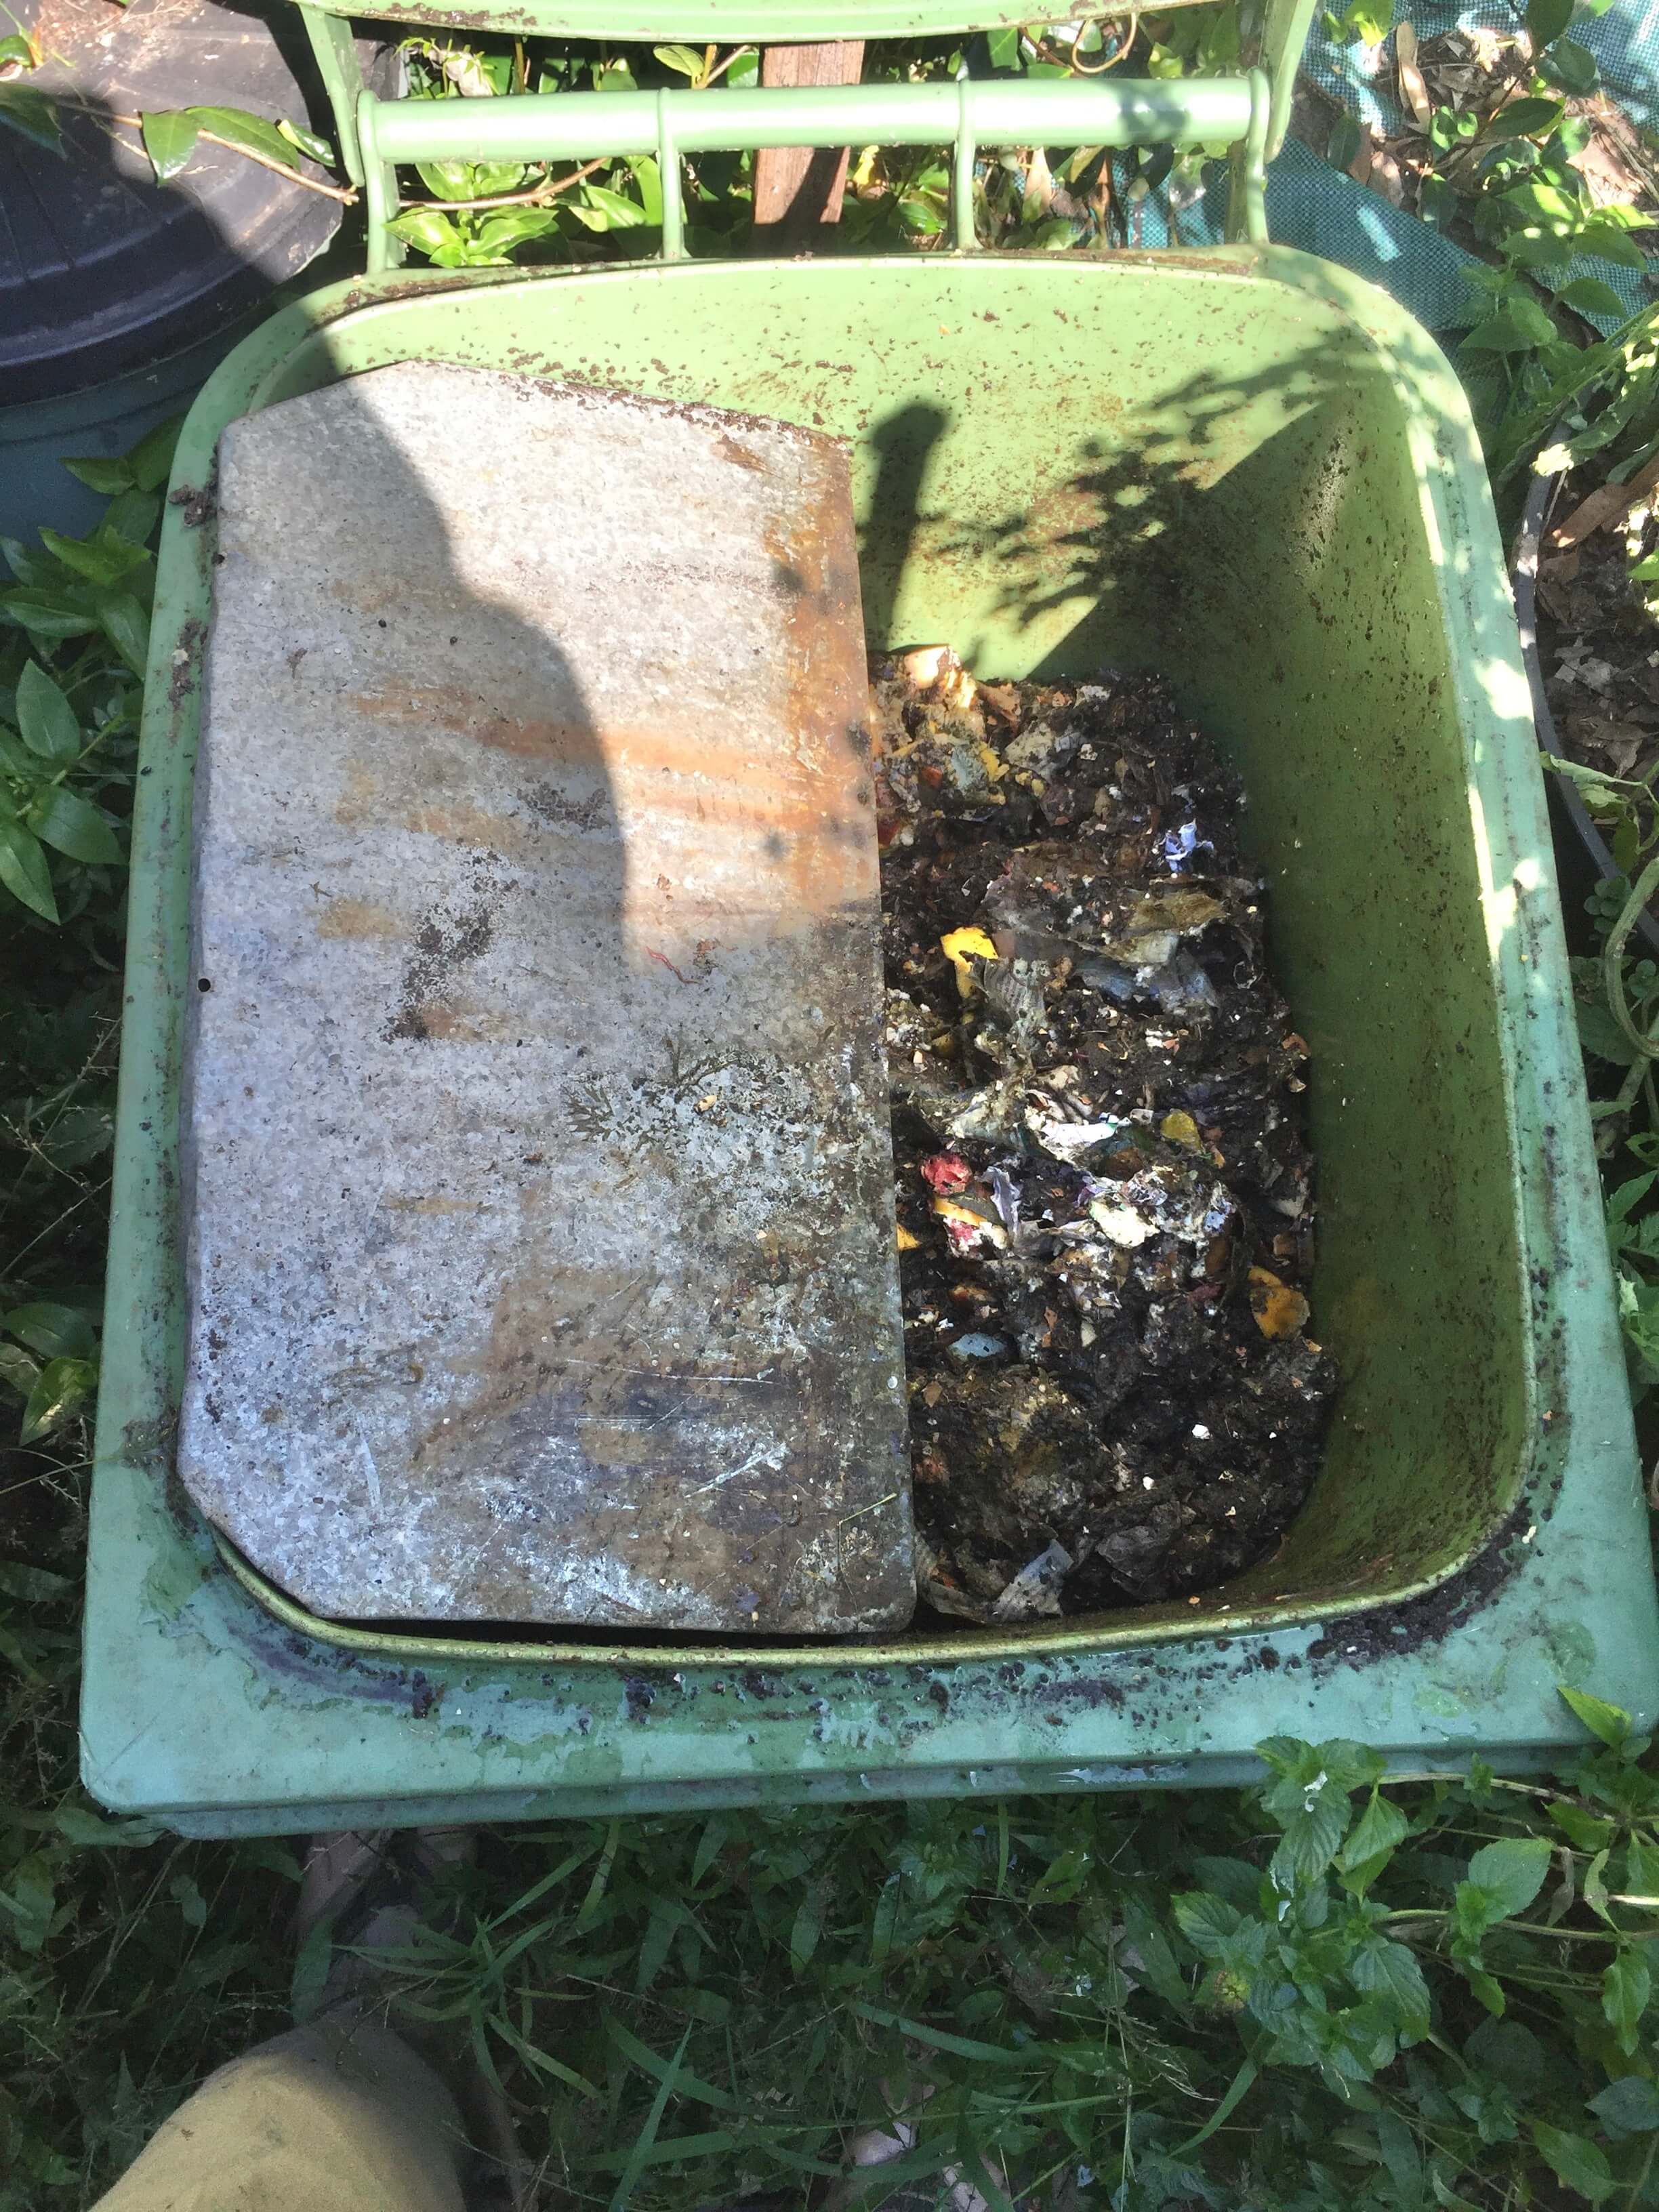
scrap food divider
A piece of metal divides off one half so the new food falls into the the right hand side. when its full I move the metal to cover this side. See the next photo.
With the worm castings on the left hand side now dug out, the same metal sheet now directs the food scraps into the left hand side
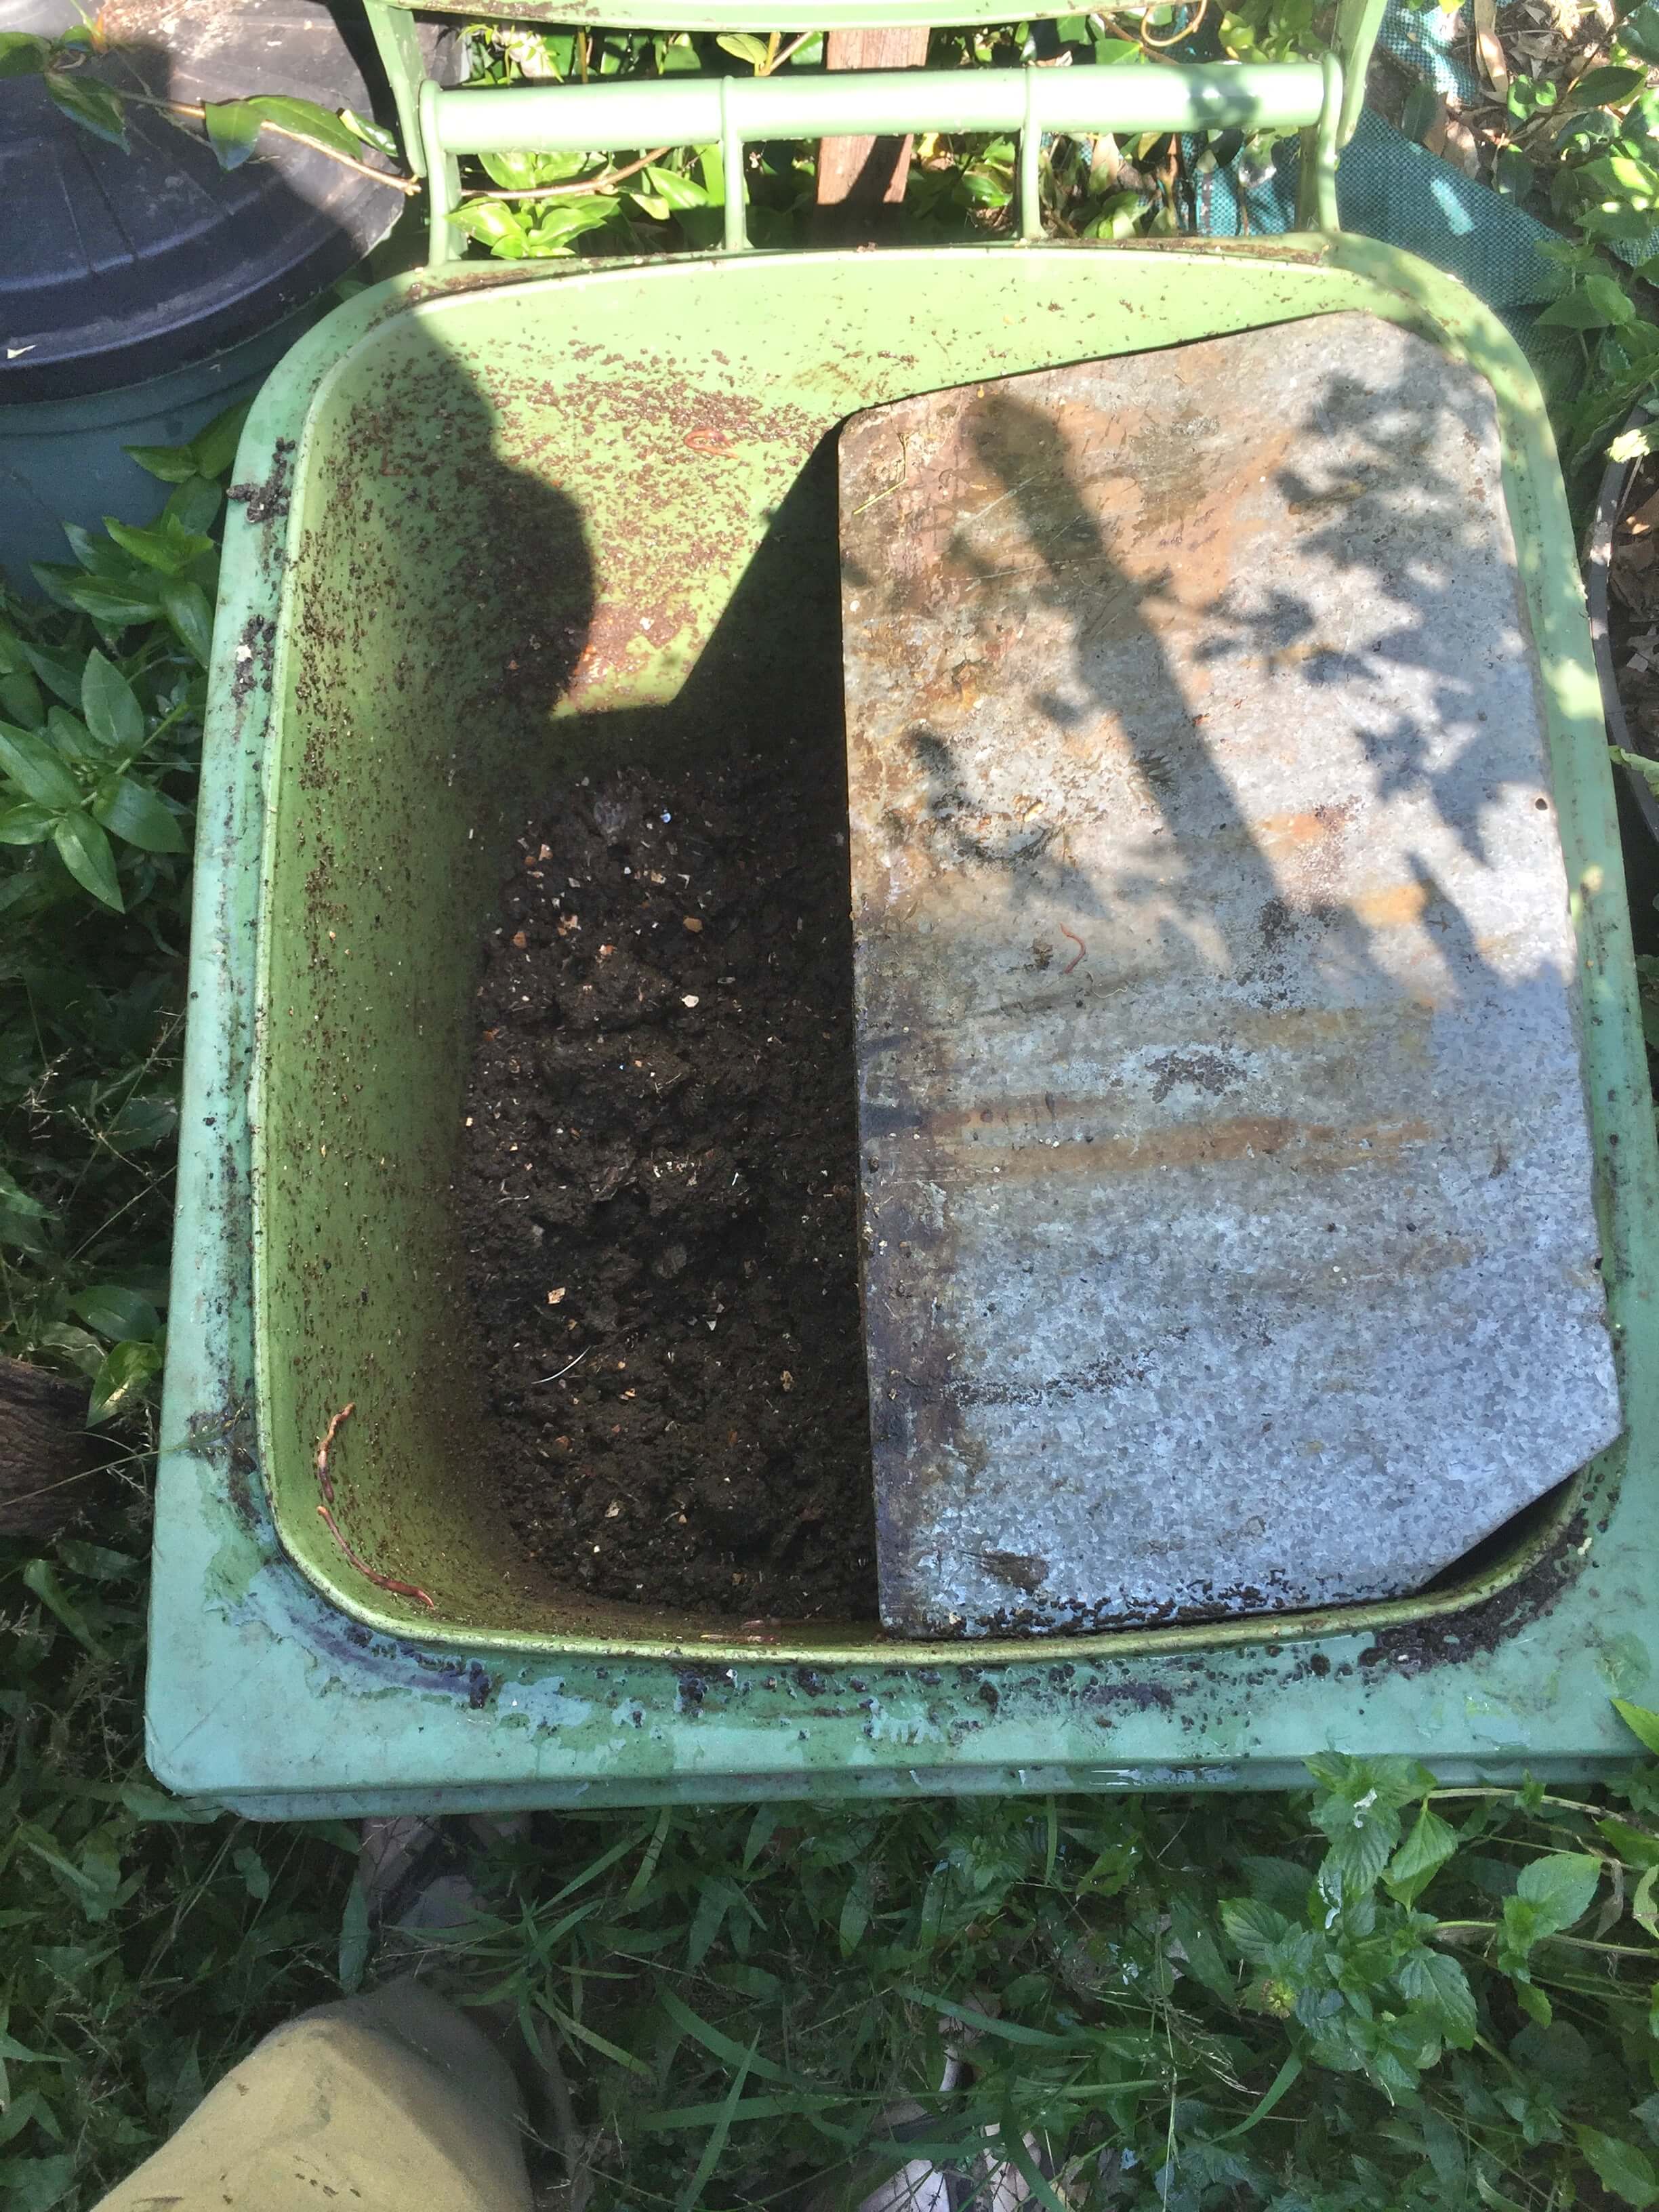
Here are the rich worm castings ready for digging out - BLACK GOLD!!

There's more to come ....
- How to remove the worm castings (black gold) and not lose your worms.
- How to use a bathtub for your super-duper worm farm.
- FAQs ...
Why do worms clump together? How much water and when, and more ...
———
What a great adventure. Its amazing what these little critters can do ...
Simple, easy and lots of fun. Get started now.
All the best with your worm farming.
Kind regards,
Warren
The Black Gold Digger
what do you think of worm farming?
maybe you Have a question?
use this form to drop me a note ...
This article was printed from GreenDoorIdeas.com